
I’ve decided to split this blog post into four main sections - “The Why”, “The How”, “What’s Missing” and “What’s Next”. If you just want to see the source code and get your hands dirty with GameByte, click here to go to the GitHub repo.
The Why
I have always been fascinated by the vast amounts of open-source projects that dive deep into the nitty-gritty of hardware and software. Things like the LEGO Island decompilation project and especially the Bad Update exploit for Xbox 360 and its associated further efforts to open the (sort of) softmodding floodgates for the Xbox 360 (shoutout to my homie InvoxiPlayGames!). The passion and drive behind these projects is something I’ve always admired, and I’ve always wanted to be a part of it in some way, shape or form. Problem is, I had a shoddy background on how low-level computing works or how to use lower-level languages like C and C++, despite working on various pieces of code for years at this point using languages like C#, Golang and JavaScript/TypeScript. Therefore, I set out to learn through what is, in my opinion, the best method: actually making a small project that needs these skills.
In this vein, I decided that an emulator would be a cool end result for a project and a goal that would keep me motivated, while also allowing me to learn some low-level computing skills AND begin learning how to use C++ at the same time. This seemed like a win-win to me! I specifically decided on the original Game Boy as the piece of hardware to emulate because not only is it extremely well documented, especially compared to many other game consoles, but it is also a piece of hardware that is very easy to emulate in comparison to other consoles as well.
The How
The (barely) beginnings
I initially started this project back in June 2025. I did some initial research mainly using Pan Docs as my guide on the Game Boy’s hardware, alongside a great blog post by CTurt where he describes the creation of his very own C-based minimal Game Boy emulator. I started with only a very basic CMakeLists.txt, and started a small amount of boilerplating, such as adding variables to represent the Game Boy CPU’s registers and basic functions to handle the Game Boy’s 16-bit register pairs, which are made up of a pairing of two 8-bit registers.
// A small sampling of the initial cpu.cpp file.
class CPU {
    public:
        // 8-bit general purpose registers
        uint8_t a, b, c, d, e, h, l;

        // Flag register
        uint8_t f;

        // 16-bit registers
        uint16_t sp; // Stack pointer
        uint16_t pc; // Program counter

        /**
         * Getter/setter methods for 16-bit register pairs
         */

        // AF register pair
        uint16_t get_af() const {
            return (static_cast<uint16_t>(a) << 8) | f;
        }

        void set_af(uint16_t value) {
            a = (value >> 8) & 0xFF; f = value & 0xF0; // Lower 4 bits of F are always 0
        }
};
And then it sat for almost 6 months!
Yeah, I’m really not the best at keeping myself motivated, even when I try to be. I quickly realized how much of a commitment this was going to be (at least, I thought, anyway) and decided to abandon it. Then, one random day just under six months later, I stumbled across the repository for GameByte and decided that I really wanted to tackle it, as I felt more motivated than ever to complete the project in order to achieve the goals I described above. This is when things truly began.
The (real) beginnings - Header files, basic CPU/MMU and the pain of MBCs
On January 6, 2026, I began seriously tackling the project. I still utilized things like Pan Docs and CTurt’s blog post as great guides to decide on some basic implementation things, alongside consulting a couple friends with much better general knowledge on low-level programming such as the previously mentioned InvoxiPlayGames.
I began by properly seperating the CPU/MMU classes into proper header and source files, as is proper C++ convention. At first, it sort of annoyed me, as I was used to being able to contain my variables, structs, and functions all in one class file, but I actually grew to like this seperation as the CPU class in particular grew to be a behemoth with all of the opcode implementations that were needed. It was a lot easier to find specific variables and things like that with this system.
I then began to implement basic communication between the CPU and MMU classes so that the CPU could read and write to the emulated RAM, alongside having the MMU class allocate sections of CPU address space to specific parts as outlined in the Pan Docs, such as cartridge ROM space, video RAM (VRAM), and specific I/O registers and sprite attribute memory for input and the PPU respectively.
class MMU {
    public:
        uint8_t read_byte(uint16_t address);
        void write_byte(uint16_t address, uint8_t value);

        uint16_t read_word(uint16_t address);
        void write_word(uint16_t address, uint16_t value);

        bool load_game(const uint8_t* data, size_t size);
    private:
        unsigned char cart[0x8000]; // 32 KB total cartridge ROM space
        unsigned char vram[0x2000]; // 8 KB of video RAM (VRAM)
        unsigned char eram[0x2000]; // 8 KB of external RAM (cartridge battery-backed RAM)
        unsigned char wram[0x2000]; // 8 KB of work RAM (WRAM). In CGB mode, this is switchable banks 1-7
        unsigned char oam[0xA0];    // 160 bytes for sprite attribute memory (OAM)
        unsigned char io[0x80];     // 128 bytes for I/O registers
        unsigned char hram[0x7F];   // 127 bytes for high RAM
        uint8_t ie;                 // Interrupt Enable register (IE) at 0xFFFF
};
I also added a ROM class that could load basic Game Boy ROMs utilizing standard C++ functions like fseek and fread. At this time, I only implemented basic cartridge ROMs. Basically, many Game Boy games utilize Memory Bank Controllers (MBCs for short) that expand the available address space for games by using bank switching. Not only is this logic much more complicated to write into an emulator, but there are also at least 27 different known mappers across the original Game Boy library, making full compatibility extremely difficult. Plus, the only game that matters, Tetris, does not use any MBCs or other hardware inside its cartridge, so this worked out perfectly.
Next, I wrote a lot of the basic emulation loop code into main.cpp, handling things like the specific cycles per frame (70,244) for timing. The basic CPU loop went as follows:
// main.cpp
// Run CPU for one frame
while (cycles_this_frame < CYCLES_PER_FRAME) {
    try {
        int cycles = cpu.step();
        cycles_this_frame += cycles;
    } catch (const std::exception& e) {
        std::cerr << "[GameByte] Emulation error about to occur. Total cycles we got through: " << cpu.total_cycles << std::endl;
        std::cerr << e.what() << std::endl;
        running = false; // Stop on error
        break;
    }
}
// cpu.cpp
uint8_t CPU::step() {
    if (!mmu) {
        throw std::runtime_error("[CPU] MMU was not connected to CPU before execution");
    }

    uint8_t opcode = mmu->read_byte(pc);
    printf("[CPU] DEBUG: Executing opcode 0x%02X (instruction %s) at address 0x%04X\n", opcode, instructions[opcode].name, pc);
    pc++;

    uint8_t cycles = (this->*instructions[opcode].operate)();

    total_cycles += cycles;
    return cycles;
}

void CPU::init_instructions() {
    instructions.assign(256, { "XXX", &CPU::XXX });
    instructions[0x00] = { "NOP", &CPU::NOP };
    instructions[0xC3] = { "JP a16", &CPU::JP_a16 };
    instructions[0xAF] = { "XOR A, A", &CPU::XOR_a };
    instructions[0x21] = { "LD HL, n16", &CPU::LD_HL_n16 };
    instructions[0x0E] = { "LD C, n8", &CPU::LD_C_n8 };
    instructions[0x06] = { "LD B, n8", &CPU::LD_B_n8 };
    instructions[0x31] = { "LD SP, n16", &CPU::LD_SP_n16 };
    instructions[0x32] = { "LD (HL-), A", &CPU::LD_HLmA_dec };
    instructions[0x05] = { "DEC B", &CPU::DEC_B };
    instructions[0x0D] = { "DEC C", &CPU::DEC_C };
    instructions[0x20] = { "JR NZ, e8", &CPU::JR_NZ_e8 };
    instructions[0x3E] = { "LD A, n8", &CPU::LD_A_n8 };
    instructions[0xF3] = { "DI", &CPU::DI };
    instructions[0xFB] = { "EI", &CPU::EI };
}
I decided to go with this system as it is similar to what Cinoop and a couple of other Game Boy emulators I had looked at on GitHub had done and it was easiest for me to understand what was happening. There are definitely far more efficient ways of doing this looking back, but I think it also makes it a better research emulator that way as the code is more digestible.
To do initial time synchronization, I utilzied SDL’s GetTicks() functionality and had the emulator sleep if the time elapsed was less than it would take on the actual system to run the opcode.
// Timing synchronization
uint64_t end_time = SDL_GetTicks();
double elapsed_ms = static_cast<double>(end_time - start_time);

if (elapsed_ms < FRAME_TIME_MS) {
    // Sleep for the remaining time
    SDL_Delay(static_cast<uint32_t>(FRAME_TIME_MS - elapsed_ms));
}
I was seeing some life out of the emulator at this point, albeit just an unimplemented opcode error as I had very few implemented at this stage:
![The GameByte emulator running in a terminal window. At the bottom it says "[CPU] Illegal/unimplemented opcode 0xC3 at 0x101](/img/blog/making-of-gamebyte/initial-life.png)
Opcode hell
Now, it was really time to dig into the nitty-gritty of implementing the CPU: implementing at least enough of the Game Boy’s opcodes to get Tetris to load properly. This would not have been possible without GB Dev’s awesome optables that convert the raw instruction byte to the proper assembly, alongside showing the duration of the instruction in t-states for a proper emulation, and showing what flags, if any, are changed upon execution.
Most of the opcode implementations are quite basic and not worth covering here, but for items like HALT (opcode 0x76), I had to add a halted variable to the CPU, alongside some logic in main.cpp:
// Initalize cycle count and check for halting
int cycles = 0;
if (!cpu.halted) {
    cycles = cpu.step();
} else {
    cycles = 4;
}
What the hell is a PREFIX?
The “opcode” 0xCB is not really an opcode itself, but is instead something called a prefix. The PREFIX allows access to the Game Boy CPU’s “extra” opcodes that handle things like bit manipulations, rotations and shifts. The GB Dev optables show exactly what each of the prefixed opcodes do as well, which is incredibly useful.
I got myself quite stuck on how to implement this system for quite a while. I mean, I already had a ton of basic opcodes to implement. Would I really have to write out these 256 opcodes in addition to the base 256 opcodes? Well, luckily, as it turns out, these instructions can be condensed quite easily as there are just a few basic “categories” where each opcode changes just a slight detail:
// Extended opcode implementation
uint8_t CPU::execute_cb_instruction(uint8_t opcode) {
    // Determine register target based on bottom 3 bits
    uint8_t* registers[] = { &b, &c, &d, &e, &h, &l, nullptr, &a };
    uint8_t target_idx = opcode & 0x07;

    // Most CB instructions take 8 cycles, but [HL] operations take 16
    uint8_t cycles = (target_idx == 6) ? 16 : 8;

    uint8_t value;
    // Check if target is memory ([HL]) or register
    if (target_idx == 6) {
        value = mmu->read_byte(get_hl());
    } else {
        value = *registers[target_idx];
    }

    // Decode the top two bits for the category
    switch (opcode >> 6) {
        // Shifts and Rotates (0x00 - 0x3F)
        case 0x00:
            value = handle_cb_shift_rotate(opcode, value);
            break;

        // BIT (0x40 - 0x7F)
        case 0x01:
            {
                uint8_t bit = (opcode >> 3) & 0x07;
                set_flag_z(!(value & (1 << bit)));
                set_flag_n(false);
                set_flag_h(true);

                // BIT doesn't write back
                return cycles;
            }

        // RES (0x80 - 0xBF)
        case 0x02:
            {
                uint8_t bit = (opcode >> 3) & 0x07;
                value &= ~(1 << bit);
            }
            break;

        // SET (0xC0 - 0xFF)
        case 0x03:
            {
                uint8_t bit = (opcode >> 3) & 0x07;
                value |= (1 << bit);
            }
            break;
    }

    // Write the result back
    if (target_idx == 6) {
        mmu->write_byte(get_hl(), value);
    } else {
        *registers[target_idx] = value;
    }

    return cycles;
}

uint8_t CPU::handle_cb_shift_rotate(uint8_t opcode, uint8_t value) {
    uint8_t sub_op = (opcode >> 3) & 0x07;
    bool old_carry = get_flag_c();

    switch (sub_op) {
        // RLC (Rotate Left)
        case 0:
            set_flag_c(value & 0x80);
            value = (value << 1) | (value >> 7);
            break;

        // RRC (Rotate Right)
        case 1:
            set_flag_c(value & 0x01);
            value = (value >> 1) | (value << 7);
            break;

        // RL (Rotate Left through Carry)
        case 2:
            set_flag_c(value & 0x80);
            value = (value << 1) | (old_carry ? 1 : 0);
            break;

        // RR (Rotate Right through Carry)
        case 3:
            set_flag_c(value & 0x01);
            value = (value >> 1) | (old_carry ? 0x80 : 0);
            break;

        // SLA (Shift Left Arithmetic)
        case 4:
            set_flag_c(value & 0x80);
            value <<= 1;
            break;

        // SRA (Shift Right Arithmetic - preserve bit 7)
        case 5:
            set_flag_c(value & 0x01);
            value = (static_cast<int8_t>(value)) >> 1;
            break;

        // SWAP (Swap nibbles)
        case 6:
            set_flag_c(false);
            value = ((value & 0x0F) << 4) | ((value & 0xF0) >> 4);
            break;

        // SRL (Shift Right Logical)
        case 7:
            set_flag_c(value & 0x01);
            value >>= 1;
            break;
    }

    set_flag_z(value == 0);
    set_flag_n(false);
    set_flag_h(false);
    return value;
}
While this was not fun to figure out whatsoever, and took tons of research into how the Game Boy’s CPU (and the Z80 that it is based on) works with this prefix system, at least it has a nice, clean solution in the end.
The PPU
As this post is already extremely long, I won’t go into insane detail here, as you can read the full source code on your own, in addition to the Pan Docs and other useful documentation describing the PPU in great detail.
In short, though, the PPU connects to the MMU (where its VRAM is stored), then initializes SDL’s video component, and creates a window, a renderer, and a texture that holds the current framebuffer data. Then, the PPU also ticks to move between its 4 states - OAM search, pixel transfer, H-blank, and V-blank. These timings are necessary to get proper data into the framebuffer.
To draw a scanline, the draw_scanline() function gets the current scroll position (the X/Y coordinates of where the frame is meant to render out of the total 256x256 map), reads the tile map, the tile indices, and then extracts the pixels needed to be placed on the scanline to then go into the framebuffer, in this case, an SDL texture.
Eventually, I got this to render!
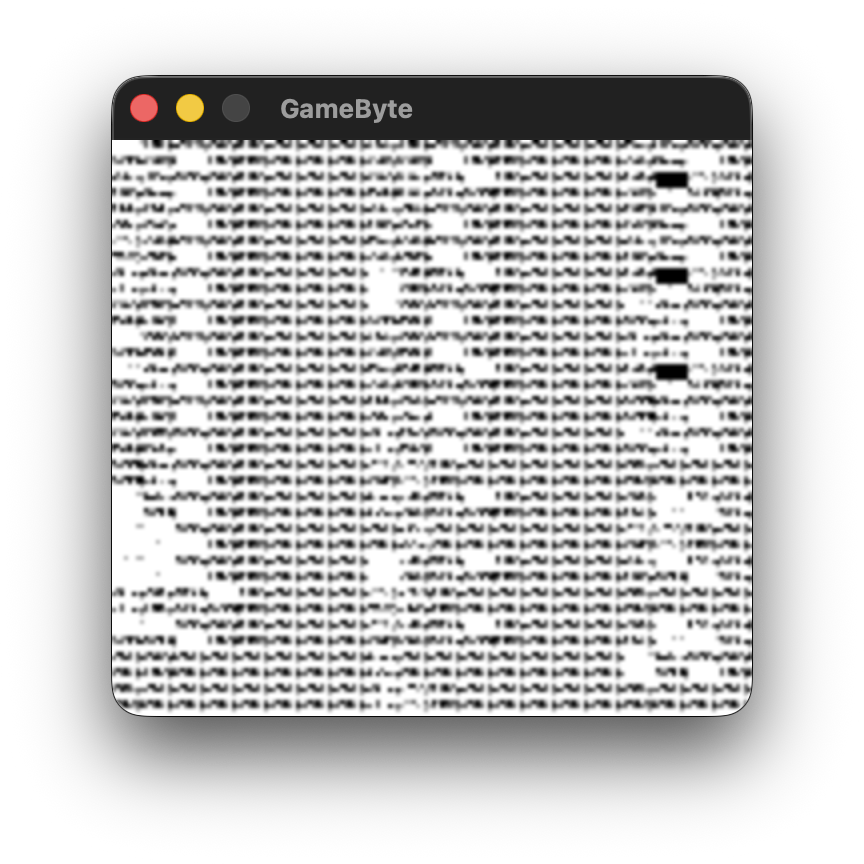
Okay, I mean this isn’t usable whatsoever, but hey, I actually got something to render! Truly incredible stuff in my view when I didn’t really know what I was doing properly. There was a lot to tackle from here. For instance, something that made me pull my hair out for the longest time was something really basic that I screwed up and didn’t realize.
This code looks very innocent:
uint8_t ppu_cycles;
However, you may have realized that this is not a large enough integer to store the amount of PPU cycles needed to complete, well, a full PPU frame. Basically, you need to get up to 456 cycles before the PPU will reach the v-blank interval step. Problem is, you can only go up to 255 with an 8-bit integer. Whoops!
Changing that to a 16-bit integer got me a proper v-blank:
uint16_t ppu_cycles;
Well, somewhat. This took much, MUCH more work to figure out, and was a multi-faceted fix, but the most crucial piece of the puzzle was ensuring that the PPU was properly set upon execution beginning. As I was leaving everything uninitalized, random garbage was floating around the VRAM/PPU I/O register section of RAM, therefore, things were mega screwed up.
PPU::PPU() {
    // Initialize registers to Post-Boot ROM defaults
    lcdc = 0x91; // LCD enabled, Window enabled, BG window/tile Data @ $8000
    stat = 0x85;
    scy = 0x00;
    scx = 0x00;
    lyc = 0x00;
    bgp = 0xFC;

    current_ly = 0;
    ppu_cycles = 0;
    mode = 2; // Default - OAM search

    // Clear framebuffer
    memset(framebuffer, 0, sizeof(framebuffer));
}
I intentionally skipped including the boot ROM or replicating it in the emulator for two main reasons: A) Nintendo is extremely litigious and would find any reason possible to sue an emulator developer as seen with the Switch emulator debacle; and B) this was a much easier method generally.
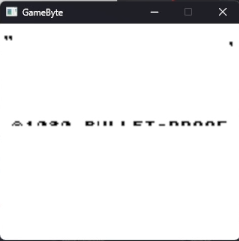
After all of this work, I finally got this glorious sight to appear!
I added a line to the PPU’s initialization to make the 2x scale I was doing much more crisp utilizing SDL once again:
SDL_SetTextureScaleMode(texture, SDL_SCALEMODE_NEAREST);
Much better!
Handling Input (and getting Tetris up and running)
Input handling, especially with SDL on my side, was honestly one of the simplest parts of the project. The Game Boy has a pretty simple scheme for reading the joypad’s current staste utilizing a specific I/O register called JOYP. The only weird thing about it really is that it is active-low, meaning that a byte set to OFF (or 0) actually means the button is being pressed.
Other than that, all I had to do was add a handler to the Joypad class that handles the SDL event and converts keyboard presses into the proper bit layout to send to the JOYP register. You can see this implementation in full here.
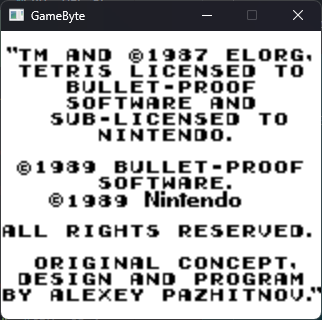
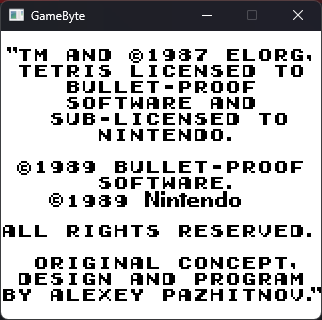
Finally, after this (and implementing more opcodes I was missing), I was able to play Tetris in all its glory!
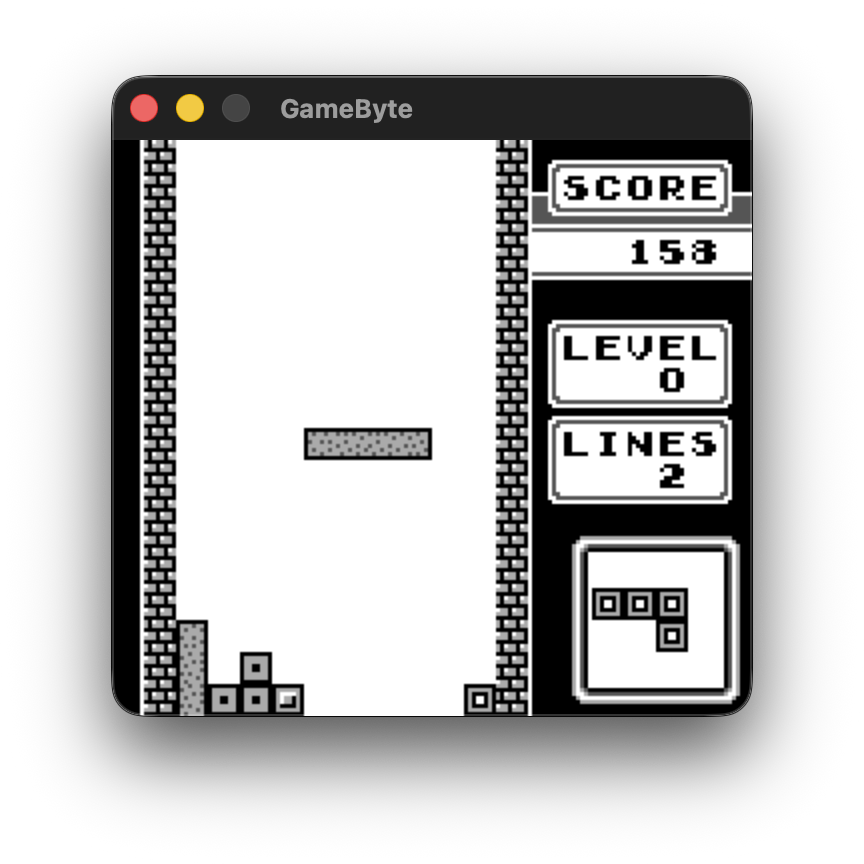
This moment felt like such a massive accomplishment. Yes, this has already been done a million times. Yes, I didn’t have to do any of the underlying hardware research that the pioneers of Game Boy emulation would have had to do. However, this was something I had created myself that is still pretty complex, and that fact made me incredibly proud of myself.
Utilizing Test ROMs to Improve Accuracy
Since Tetris is a very basic game, the emulator did not need to be insanely accurate to play it, and it most certainly wasn’t after I implemented SDL’s open system file dialog functionality and began being able to use test ROMs properly. c-sp’s Game Boy Test Roms repository contains various awesome test ROMs that help emulator devs more easily uncover problems with their accuracy.
I utilized various different test ROMs to improve GameByte’s accuracy, but I’ll briefly discuss one that was helpful to fixing up my PPU - dmg-acid2 by Matt Currie. This test ROM helps debug emulation problems specifically with PPU emulation, as specific timings and functionality gets quite complex.
When I opened this ROM on GameByte initially, it looked like this:
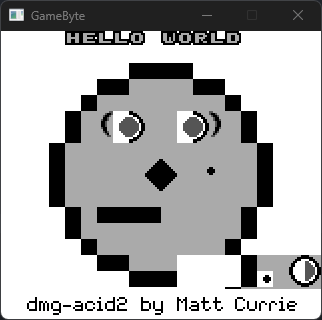
The README file for dmg-acid2 gives you a lot of common failure examples and the specific inaccuracy that the failure tests for. For example, the eye whites’ left half being garbled (as shown above) are a result of the Object to Background Priority bit (bit 7) not being accounted for properly, as it should utilize this bit to replace the white portion with a dark gray object.
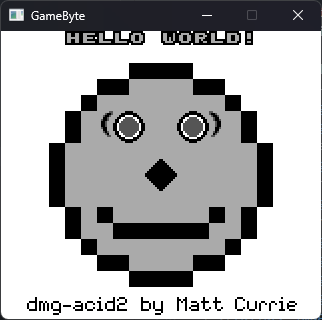
I fixed up this and all the other errors and finally got it rendering perfectly:
Fine, let’s add one MBC type
When I realized that Super Mario Land, also one of my favorite original Game Boy games, did not work on my emulator due to missing the implementation of MBC1 (the first and most basic type of MBC, luckily), I finally decided to tackle that specific one. I also decided to implement it fully, including the battery backed RAM portion, so that games like The Legend of Zelda: Link’s Awakening can properly save.
MBC1 is a memory bank controller that supports anywhere from 512 KiB to 2 MiB of ROM and anywhere from 8 KiB to 32 KiB of extra RAM. There are specific memory addresses that if written to, will interface with the MBC on the cartridge to toggle the current ROM and RAM banks in use.
The MMU handles almost all of the MBC1 logic, starting with the battery backed RAM functionality:
bool MMU::load_save(const char* filename) {
    std::ifstream file(filename, std::ios::binary);
    if (!file) return false;

    file.read(reinterpret_cast<char*>(eram), sizeof(eram));
    file.close();

    std::cout << "[MMU] Loaded battery backup RAM from " << filename << std::endl;
    return true;
}

bool MMU::save_game(const char* filename) {
    std::ofstream file(filename, std::ios::binary);
    if (!file) return false;

    file.write(reinterpret_cast<const char*>(eram), sizeof(eram));
    file.close();

    std::cout << "[MMU] Saved battery backup RAM to " << filename << std::endl;
    return true;
}
Then, there is the actual logic to read the ROM banking data as shown from this excerpt of MMU::read_byte():
if (address <= 0x7FFF) {
    // Cartridge ROM
    if (rom && rom->data) {
        uint8_t type = rom->data[ROM::OFFSET_TYPE];
        if (type == ROM::ROM_MBC1 || type == ROM::ROM_MBC1_RAM || type == ROM::ROM_MBC1_RAM_BATT) {
            if (address <= 0x3FFF) {
                // Bank 0 unless mode 1 selected
                uint8_t bank = 0;
                if (mbc1_banking_mode == 1) {
                    bank = (mbc1_ram_bank << 5);
                }
                size_t offset = (bank * 0x4000) + address;
                return rom->data[offset % rom->size];
            } else {
                // Bank 1-7F (switchable)
                uint8_t bank = mbc1_rom_bank; // Lower 5 bits
                // If Mode 0, include upper 2 bits from ram_bank
                if (mbc1_banking_mode == 0) {
                    bank |= (mbc1_ram_bank << 5);
                }
                size_t offset = (bank * 0x4000) + (address - 0x4000);
                return rom->data[offset % rom->size];
            }
        }
        // For non-MBC1 roms, just read directly
        return rom->data[address % rom->size];
    }
    return cart[address];
}
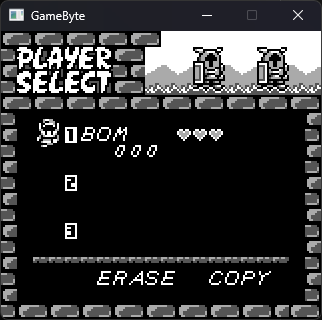
After implementing this and a couple of other parts, Super Mario Land (and therefore many other games) began working, and Link’s Awakening can even save and load properly as a real cartridge would!
What’s Missing
There are three main components still missing from this emulator that keeps it from being a full-featured Game Boy emulator:
- Only MBC1-based cartridges are supported. There are several other pieces of cartridge hardware that needs to be emulated to get all games to work properly on GameByte.
- There is absolutely no sound.
- The emulator is still not fully accurate, failing a few Mooneye test suite tests related to the PPU.
What’s Next
Well, in terms of GameByte, probably not much unless there’s a lot of demand for it for whatever reason. I made this project as a cool way to build some basic skills in low-level computing and C++, and developing GameByte to the point it is at has more than satisfied that goal at this point. Plus, it plays the Game Boy games I most care about, after all, even if they lack sound.
Plus, emulators like SameBoy exist that can emulate Game Boy and even Game Boy Color games in a far more accurate manner, alongside full debugging features and a nice user interface.
However, my future adventures beyond GameByte are still to be determined. I’d love to continue working on lower-level projects, whether it be an emulator, or potentially homebrew development for a game console like the OG Xbox or the Wii. If you have any ideas for a project I could do, or you run a project like that that you’d be interested in having me participate in, please let me know on Bluesky, Discord, or X/Twitter.
I hope you enjoyed this nerdy deep dive into the story behind GameByte! Please let me know what you thought of this article on the above social links, and check out and/or star the GameByte repo here!